Showing posts with label Sewing. Show all posts

A 1st birthday

When it comes to kids birthday presents around here my first thought is always what can I make? I will almost always ask the parent if there is anything they need or would like and when the answer is usually "No idea" (I have to admit we are no different with our little man) I start brainstorming what to make. Sometimes I know instantly and other times I will dwell on it (and often too long and it becomes a night before job lol). This time round I decided to go with a full autumn outfit, which all started with wanting to make corduroy shorts for a gorgeous little girl who was turning 1.

Lets start at the top shall we.

Beanie:
Pattern - I heart cables by Justyna Lorkowska.
I cast on the toddler number of stitches but knitted the child size number of rows to give a more slouchy look. It kinda failed a little as the yarn seems to be a bit firm for the idea. It was an easy to follow pattern and though it was originally cast on for my little dude his big head meant it would become the perfect complimentary head topper for this outfit.

Yarn: Tivoli Emerald Aran 100% wool.
This yarn was lovingly purchased as a gift for me in Ireland by the lady's Aunt and Uncle some 3 years ago. I love the natural tweed colour and that they thought of me while travelling around one of my favourite countries in the world but if I was to be honest it was a little course to work with and I wouldn't be keen to purchase more. Oddly though it seems to knit up quite soft which makes it totally wearable.
Cowl:
Pattern: Toddler cowl by Delia Creates
Using the same yarn as the beanie held double and a 10mm hook I whipped this up in the space of about 40mins. I did add an extra 10 chains to the start and only did 5 rounds. It was simple, quick and a satisfying project.
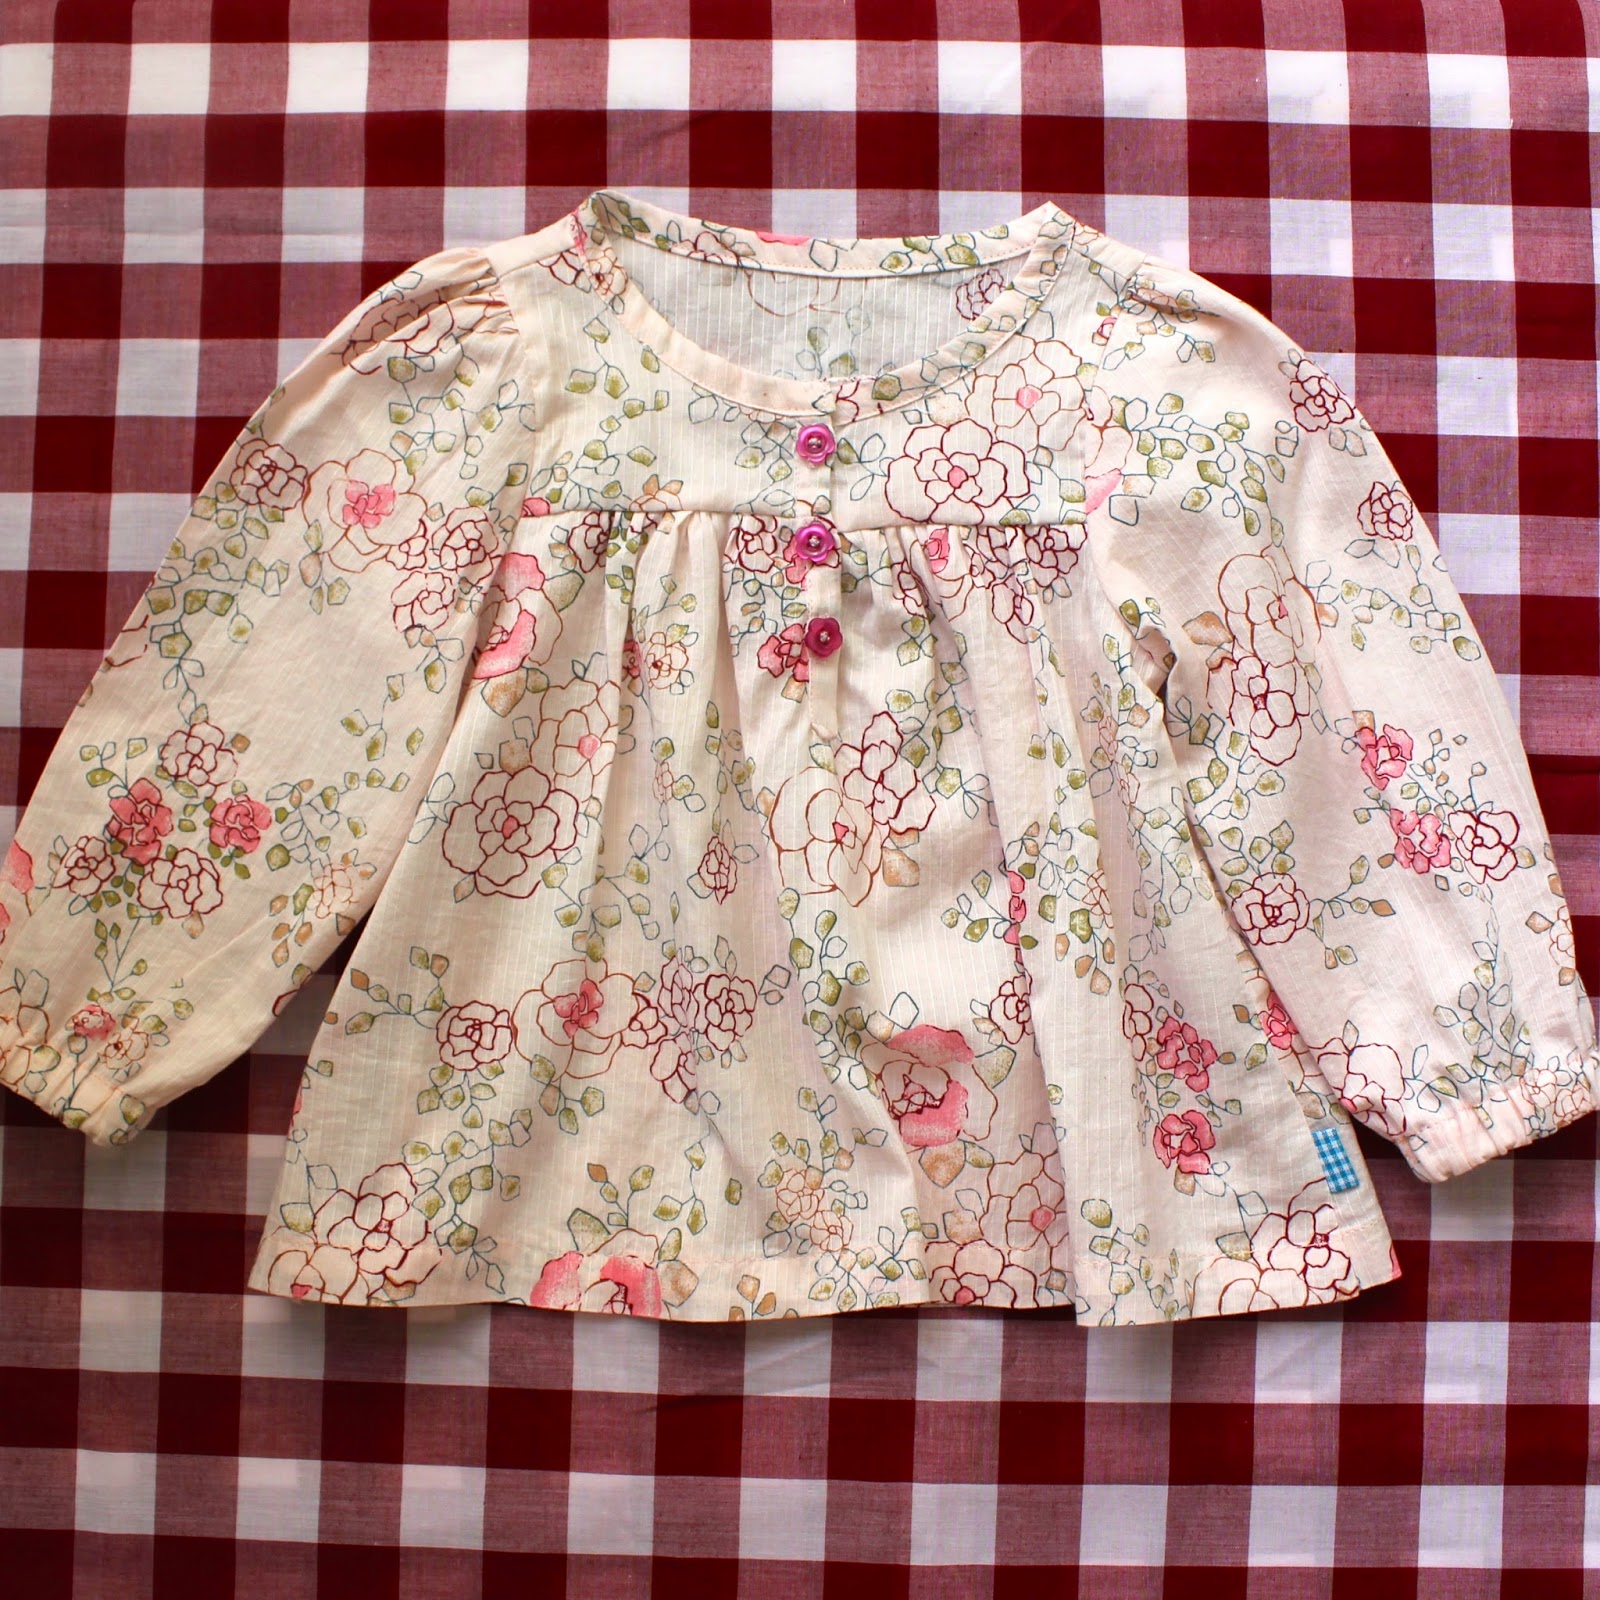
Top:
Pattern - self draft based on pattern C in the Japanese pattern book Happy Homemade vol2.
Fabric - upcycled skirt I had made in Vietnam that I had worn maybe twice but couldn't part with as I loved the fabric!
This was the first time I had ever done a planket and I am pretty proud of my efforts! This top turned out better than I thought it would and I loved that had cute buttons to match already on hand.

Shorts:
Pattern - Self draft based on the Kid Shorts pattern by Dana Willard.
Fabric - Corduroy and floral cotton I've had in my stash forever.
For the shorts I added a cuffed bottom and a separate waistband to the top and to get a gathered look added about 4 inches to the front and back pieces. By using the floral cotton fabric on the inside of the waistband and cuffs it took away the irritation of having corduroy straight on the skin, plus it added an awesome pop of colour.


Tights:
Pattern - Self drafted.
Fabric - Upcycled wool/acrylic cardigan. Soooooo soft.

Last but not least these tights, with just 2 pieces and the rainbow elastic, were an awesome make. Total sewing time about 10mins!

Making a whole outfit is certainly more time consuming than just making a single item (obviously) but the results definitely made it worth it! Cuteness overload that's for sure!

A Sew-A-Long

A few weeks ago I was wandering through Spotlight during there 40% off sale and decided to purchase some brushed cotton. I had no real plans for it but was thinking it would make a pretty funky long sleeve top of some sorts. Once home I spied my pile of Japanese sewing books and thought “I know! It will look awesome as that hoodie pattern.” Low and behold the wonderful Cherie & Meg of You +Mie and Elsie Marley fame had the same idea and they were going to do a sew-a-long! It was meant to be………or not so in the end (more of that to come)!

button  happy homemade sew a long

I started out strong. I traced and resized my pattern pieces to an approximate size 2 making slight modifications as I went:

  • Long sleeved instead of 3/4
  • Adding more room to the hood even then knowing it wouldn’t really be wearable as the recipient’s head is bigger than the percentile charts!
  • Making the front and back piece’s side and hem’s straight as I wasn’t adding the drawstring bottom and didn’t want it to flare out.

Sleeve  Hood  Back  Front 

Next up I cut out all the fabric pieces. I was pretty pleased with myself as I was being patient and doing the sewing-a-long as just that – a sew-a-long. Tracing out the pattern pieces when instructed to do so (technically I started that early but I finished it with everyone else) and cutting the fabric in the same way.

fabric cut out

However that’s when things went awry.

Wednesday was the day to start sewing which when I woke up was my intention. I had to nanny in the morning and then I would have the whole afternoon to sew it together but what was to happen next was totally unexpected (in the most awesome way possible) and though I can’t say why it will one day have it’s own blog post. Needless to say I didn’t even step into my sewing room.

Thursday came and it was a trip to Sydney and dinner with friends. This trip was always on the cards but that was ok because I had factored that in to my sew-a-long week. At this point I was playing it cool, all good I can sew it up tomorrow (Friday) no sweat. Then I got a call from Mum “If Dad and I took the day off and came down to help get your house and yard in order would we be of any use?” ahhhhhhh HELL YEA!!!! Since moving in we have been sooooo lazy with getting stuff done so I was never going to say no! Mum kindly informed me they will be on our door step at 9am. Right. Ok then. Hang on what time are they leaving? 3am. Eeek. Drive safe. They are day tripping it? Crazy. (My parents live 5 hours away FIVE HOURS ONE WAY!)

Friday was upon us and a phone call at 8am from Dad to say they were at the twin servos so get up (about 50mins away)awoke me from slumber. Gee thanks Dad you said 9am the alarm was set for 845am you killed me of 45mins extra sleep! Then we cleaned and tidied all day – actually Mum and Dad did. I kind of stood there trying to justify the amount of stuff we own (A LOT) and the lady stayed away from what was the hurricane of my parents cleaning spree. Master B and his Mum popped in and chatted with the lady lady as she washed the week long pile of dishes she had been avoiding! Then came the dinner at a friends house with Master B in tow for the evening. Needless to say it wasn’t a very late night -we were exhausted!

Saturday rolled in and I was thinking maybe I could still get the sew-a-long done today. Nope Master B wanted to play not sew and by the time his Mum picked him back up I was ready for bed. What time was that 6? 7? 8pm? Ummm no we are talking before 2pm here bahahaha!

Ok time to stop rambling – to some up the next 4 days simply I did not sew. There was stuff, lots of stuff going on but now I’m losing track of it all and the sew-a-long is over and I had nothing to add to the flickr pool or even an instagram pic. FAIL. Total sew-a-long failure! But I did finish it! YAY me. Yesterday I turned the heater on in the sewing room and got busy flicking back through the blog posts Cherie & Meg posted to at least delude myself to think I was still partaking!

I pinned the sleeves in and took a moment to make sure they were all actually on the right way (they weren’t I had to swap them) before sewing it up.

pinned to sew

With one final adjustment and eliminating hemming the sleeves by adding a ribbed cuff it was done. In the future I would simply line the hood it would be so much easier and less hassle than using bias tape to cover the seam. All up I am actually really happy with it and I learnt a lesson too – stick to what I usually do trace pattern, cut fabric and sew all in the day that way if anything comes up it doesn’t drag out for another week!

happy homemade hoodie

Leggings aren’t just for girls

These days this title definitely rings true, especially for toddlers. Little boys everywhere are running around in leggings and why not I say, they are comfy, cosy and warm all at once and fabric choices are only limited by your imagination if you feel the urge to whip a few pairs up – which I think you should! They are dead easy and super quick and really only require basic sewing skills. Like seriously how cute are they?


Leggings blue  Leggings orange

This isn’t a tutorial because why invent the wheel just google “toddler leggings tutorial” and there is an abundance of options for you to choose from. That been said I will give you are couple of pointers about what I did.

  • First up I made my pattern by tracing a pair of leggings I borrowed from Master B’s closet (which most tutorials will show you). I made the front crotch shorter and lower (just like most pants patterns) giving them a distinctive front and back as opposed to making the front and back the same. I tend to find this leads to a better overall fit.
  • I had just one pattern piece eliminating the side seams.
  • I detest hemming knits. I can do it and usually with pretty good results but if I can avoid it I will and so for both pairs I used t-shirts I scored on clearance for like $1 each. By using the existing hem there was only 2 seams to sew and the casing! Wohoooooo!
  • I used 1/2” elastic for the waistband if people were curious.
  • I used a double needle to sew the casing down so it has a bit of give though a small zig zag works just as well (In fact you can’t see it in these pics but the back of the orange pair are sewn exactly like that after I cracked it with the double needle lol shhhhhh no one will notice)

So why make your own when they are pretty darn cheap? For me the reason is 3 fold – 1) I love making stuff, 2) Store bought are so same same, time to live out the individuality dream (or something crazy like that lol) and 3) Custom fit. This last one is the big one for Master B with his teeny 000 waist! By sewing him some up they fit both in the leg and the waist!

I think he looks pretty spunky and definitely cozy though next time I think Aunty Nomi will change his socks and make more of an effort to tuck in his singlet bahahaha!

Legging blue on  Leggings orange on

Giving Back

Day for girls 1Day for girls 2Day for girls 3Day for girls 4Day for girls 5
Day for girls 6
Instagram, gahhhhhh, I love you, maybe a little too much, but sometimes that is a good thing. A couple of weeks ago I was doing the usual scroll through my feed when the lovely Shelley over at Spin Cushions (want to learn to crochet? Shelley has an awesome tutorial series to get you going!) posted a picture about a project she was helping out on and I thought “now this is something I can do!” The project is called Days for Girls and Cath from My Bearded Pigeon put a shout out into the instagramming world for people to help out. Days for Girls is about providing girls in impoverish communities with sustainable feminie hygiene products – reusable pads and washcloths, to keep them in school and work.

As their website states – Imagine if not having sanitary supplies meant DAYS without school, DAYS without income, DAYS without leaving the house? Girls use leaves, mattress stuffing, newspaper, corn husks, rocks, anything they can find……but still miss up to 2 months of school every year. Worse, girls are often exploited in exchange for hygiene. It turns out this issue is a surprising but instrumental key to social change for women all over the world. The poverty cycle can be broken when girls stay in school.

Now anyone who knows me well enough (and well all of you now to) would know if it wasn’t for the wonders of modern medicine a couple days a month would result in a lot of crying, screaming and withering around on the couch in agony for. While that stills happens, once those drugs kick in I’m back to normal, so I hate to imagine going through that with no access to feminie hygiene products. This was an easy project to get involved in, for about 2 hours of my time I was able to provide 2 washcloths and a carry bag that will help some girls out once a month for up to 3 years! 2 hours = 6 months extra school or work over 3 years. It’s definitely a worthwhile investment to me.

I didn’t need to buy a thing as everything was in my stash, beautiful soft cotton yarn and some nice bright cotton fabric. As the girls use the bag for everyday use I reinforced the tops of the side seams where the drawstrings goes to hopefully give it more strength! Hope the Days for Girls organisers don’t mind! Want to help out? – jump over to their website and find a local branch and enquire or there is still time to send stuff to Cath as she is collecting till Easter.

It’s definitely good to give something back!
Day for girls 7

A welcome to the world

Remember this post? Well, the little bubba has arrived to very excited parents. To me that meant there just had to be more gifts – girly gifts!!! Out came the needles and the sewing machine and I fluttered away making some more gorgeous homemade gifts. I knitted up another fantastic Kelly Brooker pattern, the composite. This pattern is a free download and a quick simple lace knit, knitted in the round top down. I went with 8ply cotton yarn from the Bendigo Woollen Mills and it was a delight to knit. Sooooo soft! I then sewed up some super quick, equally as gorgeous, circle skirts using this pattern from Dana with stash fabrics. Now the little miss has 3 outfit combinations to hang out in! Toooooo cute!


newborn knit  newborn knit  newborn knitCircle skirt 1  Circle skirt 2  Circle skirt 3

A Joy of your 30’s

One of the joy’s of hitting your 30’s is that a majority of your friends are now all loved up, married, mortgaged and pregnant and seemingly all at once. The joy in this for me is there are lots of little ones making there way into the world that just need a NOTHING TOO FANCY creation or two. This is one such creation. Mumma and Pappa have decided not to find out the sex until bubba is born so it needed to be gender neutral. I decided to take leap outside the standard white/cream/pastel yellow combinations and go grey and yellow. LOVE IT. Something bold, different, hip, cheeky and all up pretty darn cute!


puerperium & harem

First up I got knitting away on a Puerperium cardigan. This free pattern by Kelly Brooker is an awesome quick knit. I did make a few changes and go with a short sleeve top version using these notes and loved how it turned out though the striped buttonhole bands were not wise in hindsight. They look great but were just time consuming and fiddley and frustrated me, even though it was my choice to do them! Ahhh hindsight lol. It is knitted on 4mm needles with Cleckheaton country 8ply for the grey and Panda feltable wool 8ply for the yellow (I liked the colour I had no intention of felting it). Not my go to yarn but I was away at the time and choices were limited, but I love it all the same!


Next I came across this gorgeous free harem sewing pattern and just knew I had to sew a pair. I got creative using my fabric sharpie pens adding some black triangles to boring old white knit fabric and topped it off with yellow ribbing. How darling are they? Totally recommend this pattern! I see many pairs of these in my future and I think they just became my go to baby gift.


Last but not least there was a pixie bonnet. This comes with exciting news – I got a knitting machine!!! I have wanted one for ages and ages and lucky me my awesome lady found me one in mint condition for Christmas. I was sooooooooooooooooooo excited and frustrated after like 10mins of trying to use it, but 6 hours later I had managed to start creating things. This pixie bonnet was the 1st thing I made and it certainly made the stocking stitch quick. Umm less than 10mins quick! I might do up a tutorial on this someday but I would need to work out a few kinks in the pattern first! For a first attempt though I am totally satisfied.


Puerperium top  Harem pants  Pixie bonnet

Mumma and Pappa were thrilled with the handmade goodies for their little one. Lucky for our friends and family I just love making stuff!

From the Sewing Room

During my absence from the blog I did manage to squeeze in the odd bit of sewing for Master B. As the heat of summer rolled in it was apparent the poor kid was going to need some shorts that actually fit his tiny waist. So I pulled out my go-to pattern, Dana’s KID SHORTS, and got sewing. While I was at it I made a couple of pairs of girls shorts for a little lady just for something different. I’ve talked about Dana’s pattern before and honestly it is the perfect shorts pattern! Buy it, you won’t regret it!

blue & White check shorts front  blue & white check shorts back  Denim Shorts front  denim shorts backblue racer shorts  upcycle shorts front  polka dot shorts  red shorts

As Christmas rolled around I decided I wanted to make the kiddies in our lives some beach robes (again one of Dana’s patterns). Now these are far from excellent photos but they turned out super cute and I just had to share these 2. I made 4 in total and there is a LOT of bias tape making involved however, it was all worth it as they were loved by all, but I am certainly in no hurry to make another anytime soon lol.

girls beach robe  stripe beach robe

I am trying to think if I made much else. I know there were a couple of t-shirts in there but for the life of me I can’t find any photos so it looks like I gifted those without snapping a pic, bugger. I haven’t spent much time behind the sewing machine of late now that I am writing this, hmmmm………time to change that I think!