Showing posts with label Japanese Pattern Books. Show all posts

A 1st birthday

When it comes to kids birthday presents around here my first thought is always what can I make? I will almost always ask the parent if there is anything they need or would like and when the answer is usually "No idea" (I have to admit we are no different with our little man) I start brainstorming what to make. Sometimes I know instantly and other times I will dwell on it (and often too long and it becomes a night before job lol). This time round I decided to go with a full autumn outfit, which all started with wanting to make corduroy shorts for a gorgeous little girl who was turning 1.

Lets start at the top shall we.

Beanie:
Pattern - I heart cables by Justyna Lorkowska.
I cast on the toddler number of stitches but knitted the child size number of rows to give a more slouchy look. It kinda failed a little as the yarn seems to be a bit firm for the idea. It was an easy to follow pattern and though it was originally cast on for my little dude his big head meant it would become the perfect complimentary head topper for this outfit.

Yarn: Tivoli Emerald Aran 100% wool.
This yarn was lovingly purchased as a gift for me in Ireland by the lady's Aunt and Uncle some 3 years ago. I love the natural tweed colour and that they thought of me while travelling around one of my favourite countries in the world but if I was to be honest it was a little course to work with and I wouldn't be keen to purchase more. Oddly though it seems to knit up quite soft which makes it totally wearable.
Cowl:
Pattern: Toddler cowl by Delia Creates
Using the same yarn as the beanie held double and a 10mm hook I whipped this up in the space of about 40mins. I did add an extra 10 chains to the start and only did 5 rounds. It was simple, quick and a satisfying project.
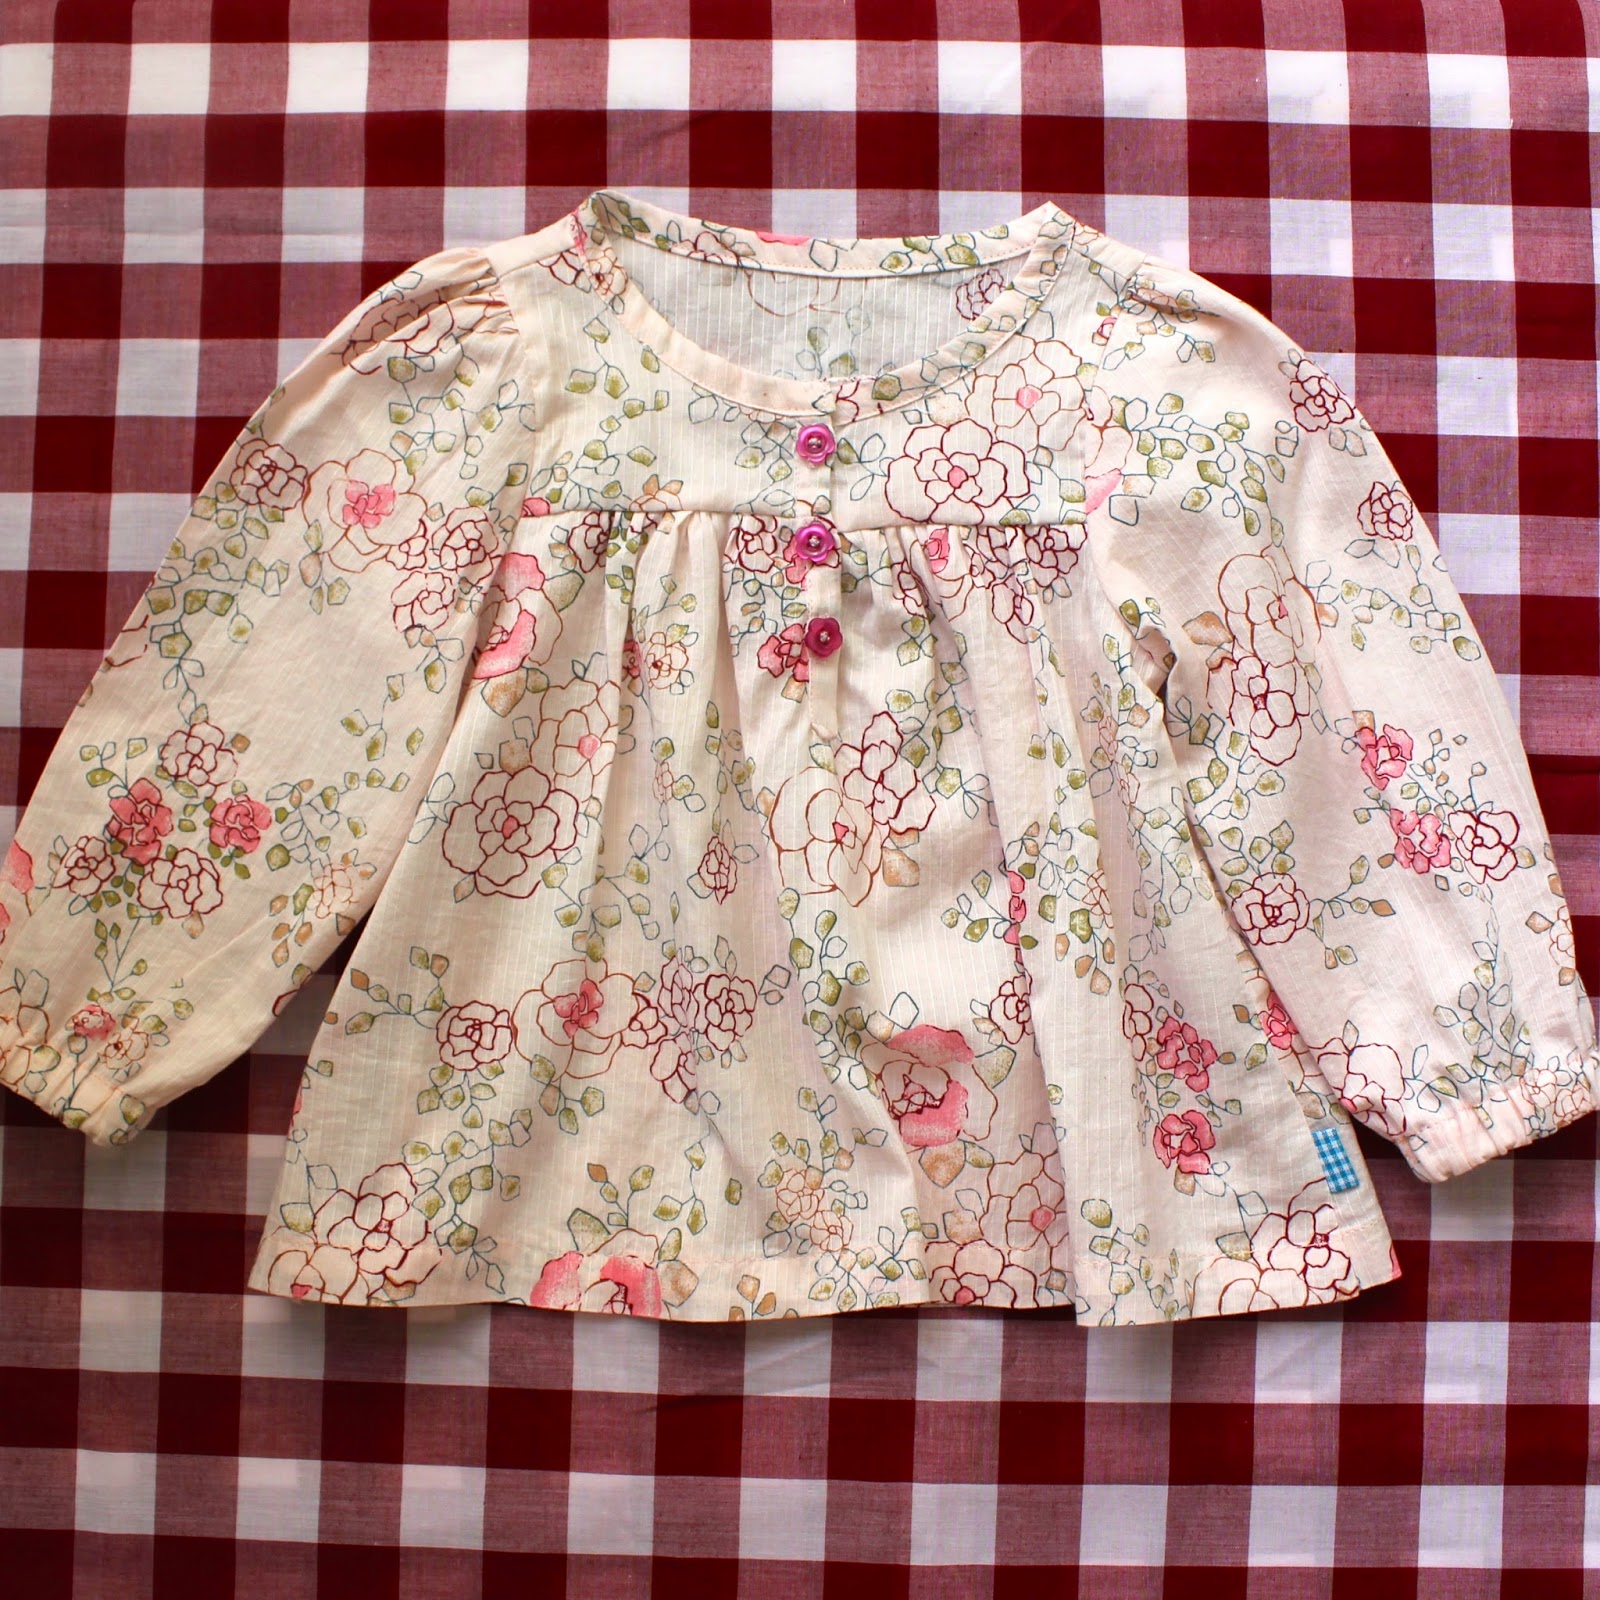
Top:
Pattern - self draft based on pattern C in the Japanese pattern book Happy Homemade vol2.
Fabric - upcycled skirt I had made in Vietnam that I had worn maybe twice but couldn't part with as I loved the fabric!
This was the first time I had ever done a planket and I am pretty proud of my efforts! This top turned out better than I thought it would and I loved that had cute buttons to match already on hand.

Shorts:
Pattern - Self draft based on the Kid Shorts pattern by Dana Willard.
Fabric - Corduroy and floral cotton I've had in my stash forever.
For the shorts I added a cuffed bottom and a separate waistband to the top and to get a gathered look added about 4 inches to the front and back pieces. By using the floral cotton fabric on the inside of the waistband and cuffs it took away the irritation of having corduroy straight on the skin, plus it added an awesome pop of colour.


Tights:
Pattern - Self drafted.
Fabric - Upcycled wool/acrylic cardigan. Soooooo soft.

Last but not least these tights, with just 2 pieces and the rainbow elastic, were an awesome make. Total sewing time about 10mins!

Making a whole outfit is certainly more time consuming than just making a single item (obviously) but the results definitely made it worth it! Cuteness overload that's for sure!

A Sew-A-Long

A few weeks ago I was wandering through Spotlight during there 40% off sale and decided to purchase some brushed cotton. I had no real plans for it but was thinking it would make a pretty funky long sleeve top of some sorts. Once home I spied my pile of Japanese sewing books and thought “I know! It will look awesome as that hoodie pattern.” Low and behold the wonderful Cherie & Meg of You +Mie and Elsie Marley fame had the same idea and they were going to do a sew-a-long! It was meant to be………or not so in the end (more of that to come)!

button  happy homemade sew a long

I started out strong. I traced and resized my pattern pieces to an approximate size 2 making slight modifications as I went:

  • Long sleeved instead of 3/4
  • Adding more room to the hood even then knowing it wouldn’t really be wearable as the recipient’s head is bigger than the percentile charts!
  • Making the front and back piece’s side and hem’s straight as I wasn’t adding the drawstring bottom and didn’t want it to flare out.

Sleeve  Hood  Back  Front 

Next up I cut out all the fabric pieces. I was pretty pleased with myself as I was being patient and doing the sewing-a-long as just that – a sew-a-long. Tracing out the pattern pieces when instructed to do so (technically I started that early but I finished it with everyone else) and cutting the fabric in the same way.

fabric cut out

However that’s when things went awry.

Wednesday was the day to start sewing which when I woke up was my intention. I had to nanny in the morning and then I would have the whole afternoon to sew it together but what was to happen next was totally unexpected (in the most awesome way possible) and though I can’t say why it will one day have it’s own blog post. Needless to say I didn’t even step into my sewing room.

Thursday came and it was a trip to Sydney and dinner with friends. This trip was always on the cards but that was ok because I had factored that in to my sew-a-long week. At this point I was playing it cool, all good I can sew it up tomorrow (Friday) no sweat. Then I got a call from Mum “If Dad and I took the day off and came down to help get your house and yard in order would we be of any use?” ahhhhhhh HELL YEA!!!! Since moving in we have been sooooo lazy with getting stuff done so I was never going to say no! Mum kindly informed me they will be on our door step at 9am. Right. Ok then. Hang on what time are they leaving? 3am. Eeek. Drive safe. They are day tripping it? Crazy. (My parents live 5 hours away FIVE HOURS ONE WAY!)

Friday was upon us and a phone call at 8am from Dad to say they were at the twin servos so get up (about 50mins away)awoke me from slumber. Gee thanks Dad you said 9am the alarm was set for 845am you killed me of 45mins extra sleep! Then we cleaned and tidied all day – actually Mum and Dad did. I kind of stood there trying to justify the amount of stuff we own (A LOT) and the lady stayed away from what was the hurricane of my parents cleaning spree. Master B and his Mum popped in and chatted with the lady lady as she washed the week long pile of dishes she had been avoiding! Then came the dinner at a friends house with Master B in tow for the evening. Needless to say it wasn’t a very late night -we were exhausted!

Saturday rolled in and I was thinking maybe I could still get the sew-a-long done today. Nope Master B wanted to play not sew and by the time his Mum picked him back up I was ready for bed. What time was that 6? 7? 8pm? Ummm no we are talking before 2pm here bahahaha!

Ok time to stop rambling – to some up the next 4 days simply I did not sew. There was stuff, lots of stuff going on but now I’m losing track of it all and the sew-a-long is over and I had nothing to add to the flickr pool or even an instagram pic. FAIL. Total sew-a-long failure! But I did finish it! YAY me. Yesterday I turned the heater on in the sewing room and got busy flicking back through the blog posts Cherie & Meg posted to at least delude myself to think I was still partaking!

I pinned the sleeves in and took a moment to make sure they were all actually on the right way (they weren’t I had to swap them) before sewing it up.

pinned to sew

With one final adjustment and eliminating hemming the sleeves by adding a ribbed cuff it was done. In the future I would simply line the hood it would be so much easier and less hassle than using bias tape to cover the seam. All up I am actually really happy with it and I learnt a lesson too – stick to what I usually do trace pattern, cut fabric and sew all in the day that way if anything comes up it doesn’t drag out for another week!

happy homemade hoodie

Retro’s back baby!

Actually I have no idea if retro is or isn’t back, it just worked for this project! Introducing The Retro Jacket. It’s bright, it’s bold, it’s funkadelic; totally hip and happening all the while practical and warm!
The retro jacket side
This project is probably one of the most ambitious one I have set out to do in a long while. It is quilted, totally lined, has a hood and a zip front closure! Plus the pattern came from one of my Japanese pattern books and nope I don’t speak or read a word of Japanese (actually that is a lie, I can count to 10 and say hello, goodbye and thank you!) So here is an insight.

Japanese book
I treat it like fabric Lego. Find the piece that matches the picture and attach. Next piece and so on and so on. I get pretty excited when I can tick off each step and move onto the next. All up I would say the jacket was actually a rather easy process albeit a lengthy one! How did I make it? Well its lined with red flannelette, to be extra warm and soft for Master B, for extra warmth I used an old (actually it was brand new I just had no use for it) polar fleece blanket as the “batting” layer and the bright blue cotton fabric I got from Ikea last year became the shell. I quilted the polar fleece to the shell in even lines and then added the stripes using bias tape I had made earlier! After all that I just followed the construction pictures above! Result? 1 totally awesome jacket!!!!!!

Retro jacket inside  Retro jacket 
I can’t wait to catch up with Master B and try it on him!!! This is one of my favourite projects ever! Only thing I wish I had done was add a little loop of ribbon at the back between the hood and back panel so Master B’s mummy can hand it on the cook hook (not that I think they have one but still!)

Word of advice on Japanese pattern books – THEY DON”T CONTAIN SEAM ALLOWANCE you must add it yourself – just letting you know!